Step 3 · Point List Management
Analyse the adaptive component's points, then manipulate lists to build the point sets you need.
Overview
Create sub-lists of points from the elevated points generated by Curve.PointAtParameter in Step 2, arranged into the data structure required to host the Revit adaptive components. Understanding lists and data structures is a fundamental computational-design skill. By the end of this step you will have:
- Analysed and understood the problem.
- Generated the point sets required for adaptive-component placement.
Objective 3.1: Analyse the problem
Before building anything, understand how the adaptive component is constructed. Each adaptive component is defined by four adaptive points, and the order of those points must match the order of the points in the sub-lists you create:
- Point 1 — top-left — call this pointA
- Point 2 — top-right — call this pointB
- Point 3 — bottom-right — call this pointC
- Point 4 — bottom-left — call this pointD
In Dynamo, the points you have are not yet structured into sub-lists of four. Reshaping data to meet an objective is a common task in procedural modelling, and the rest of this step shows how.
Start by mapping the indexes in the existing data structure (the same [row][column] structure as the point-grid diagram in Step 1.3). For any group of four neighbouring points: pointA is at [0][0], pointB at [0][1], pointC at [1][1], and pointD at [1][0].
Mapping this across the whole grid lets you segregate it into zones:
- All pointA sit in the upper-left zone — never in the right or bottom row (no neighbouring B, C or D there).
- All pointB sit in the upper-right zone — never in the left or bottom row.
- All pointC sit in the lower-right zone — never in the left or top row.
- All pointD sit in the lower-left zone — never in the right or top row.
Note that the bottom row is never used by pointA or pointB, and the top row is never used by pointC or pointD — observations we'll apply directly in Dynamo.
The original workshop illustrates each of these zones on the point grid. Those diagrams are being remade for Dynamo 3 — for now, the index mapping above is enough to follow the list work below.
Objective 3.2: Generate the point sets
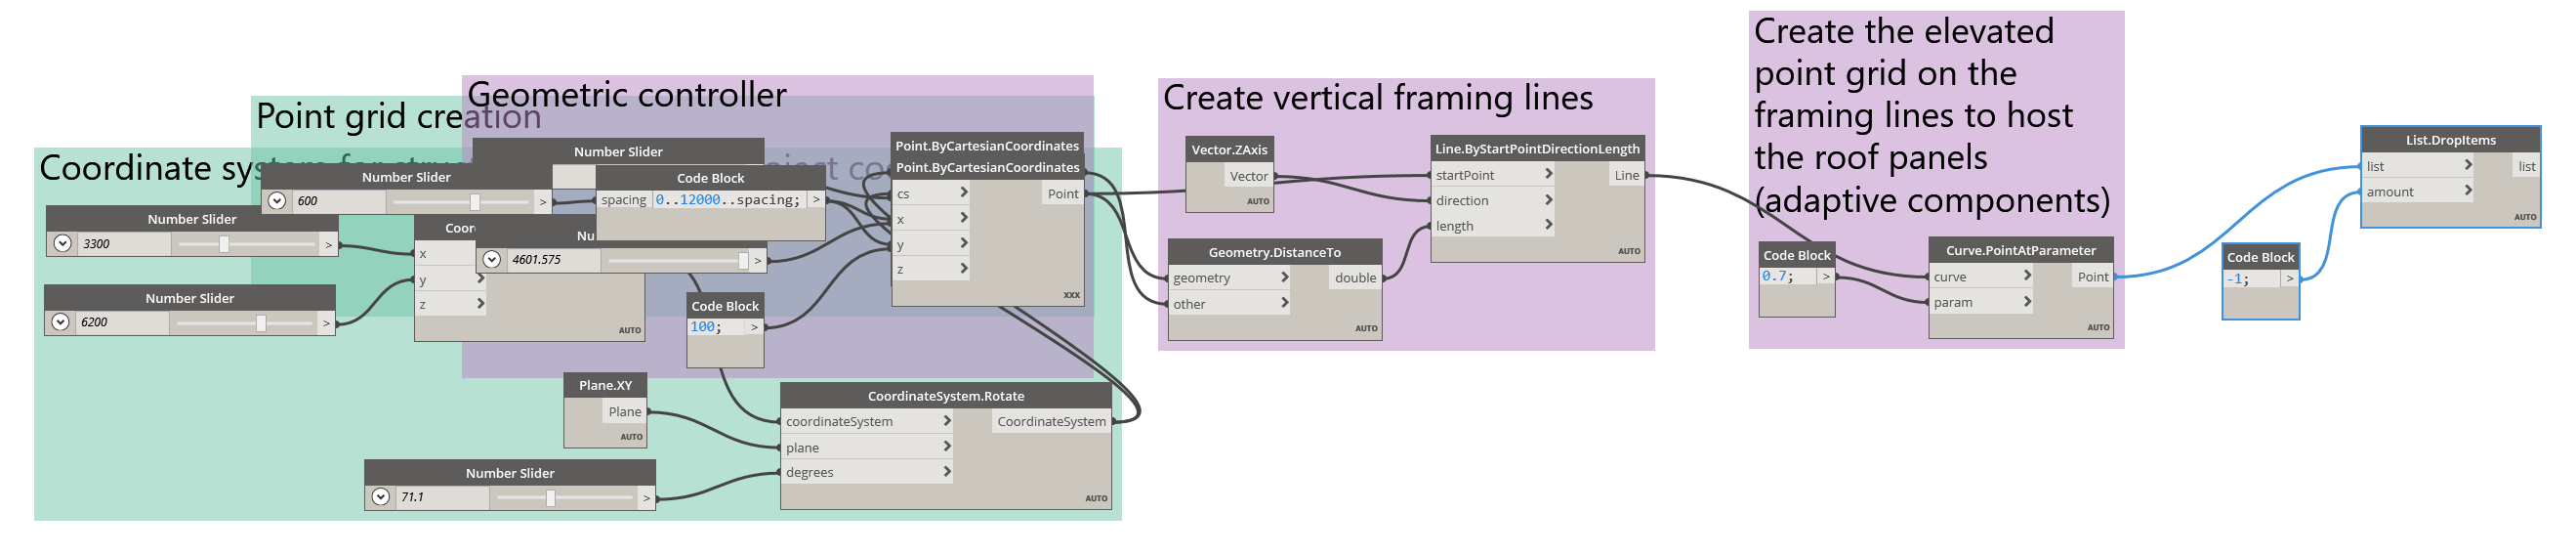
Now apply the analysis in Dynamo. Start with the pointA and pointB sets, using the elevated point grid from Curve.PointAtParameter (Step 2.3). Because neither set ever needs the last row (the last sub-list), remove it first.
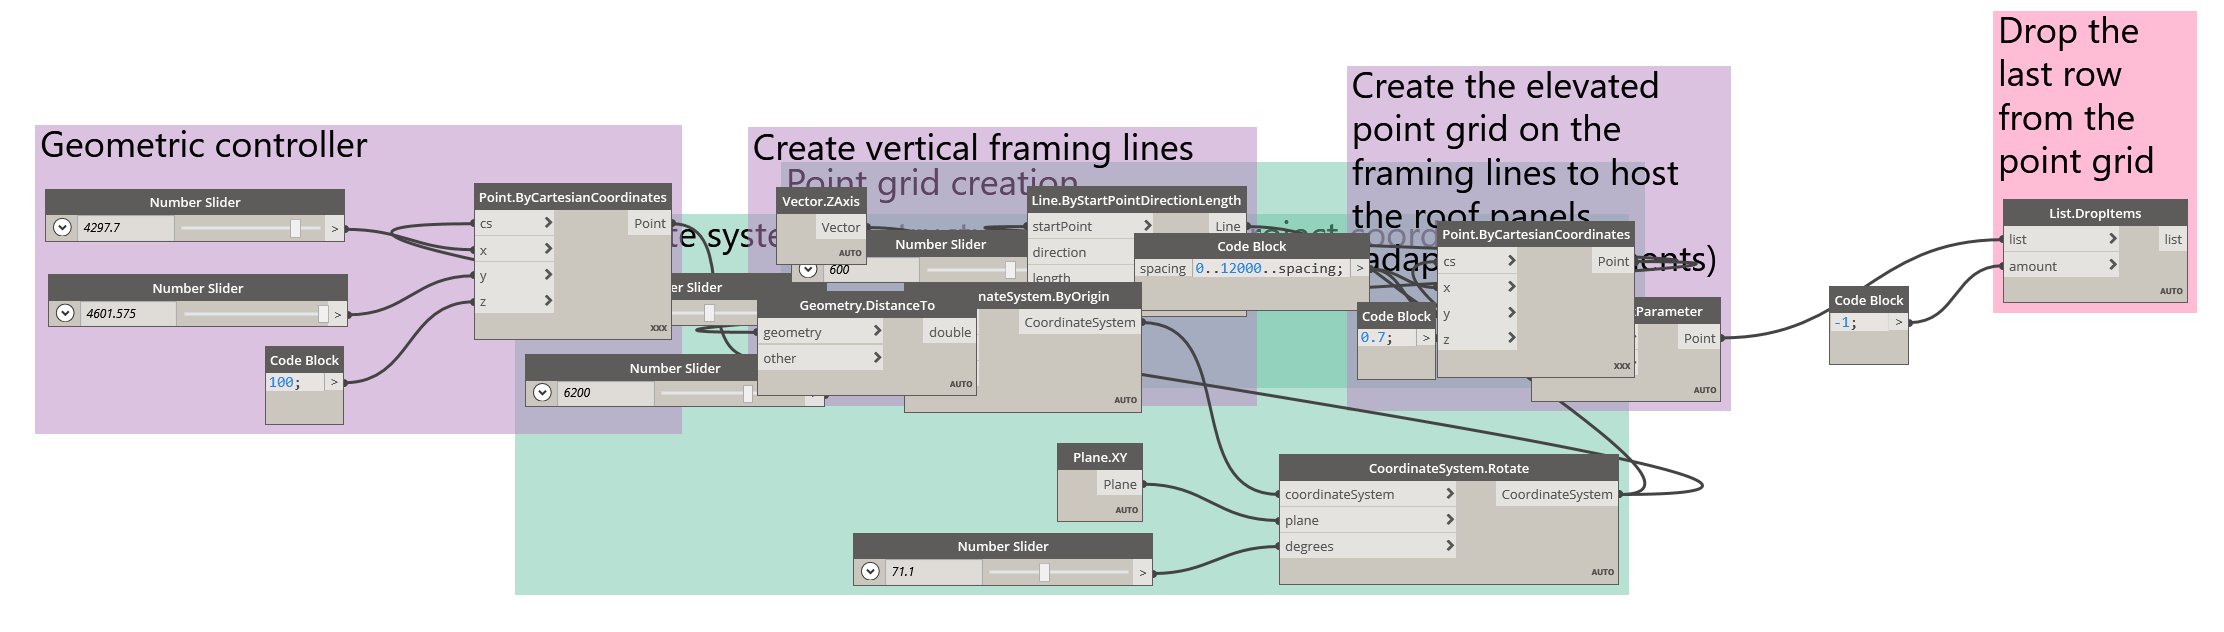
To remove an item from a list, use the List.DropItems node — on a list of lists, each "item" is a sub-list, so the whole sub-list is removed. Connect the point grid into the list input, and set amount to -1 (negative values drop from the end of the list) using a code block or a Number node.
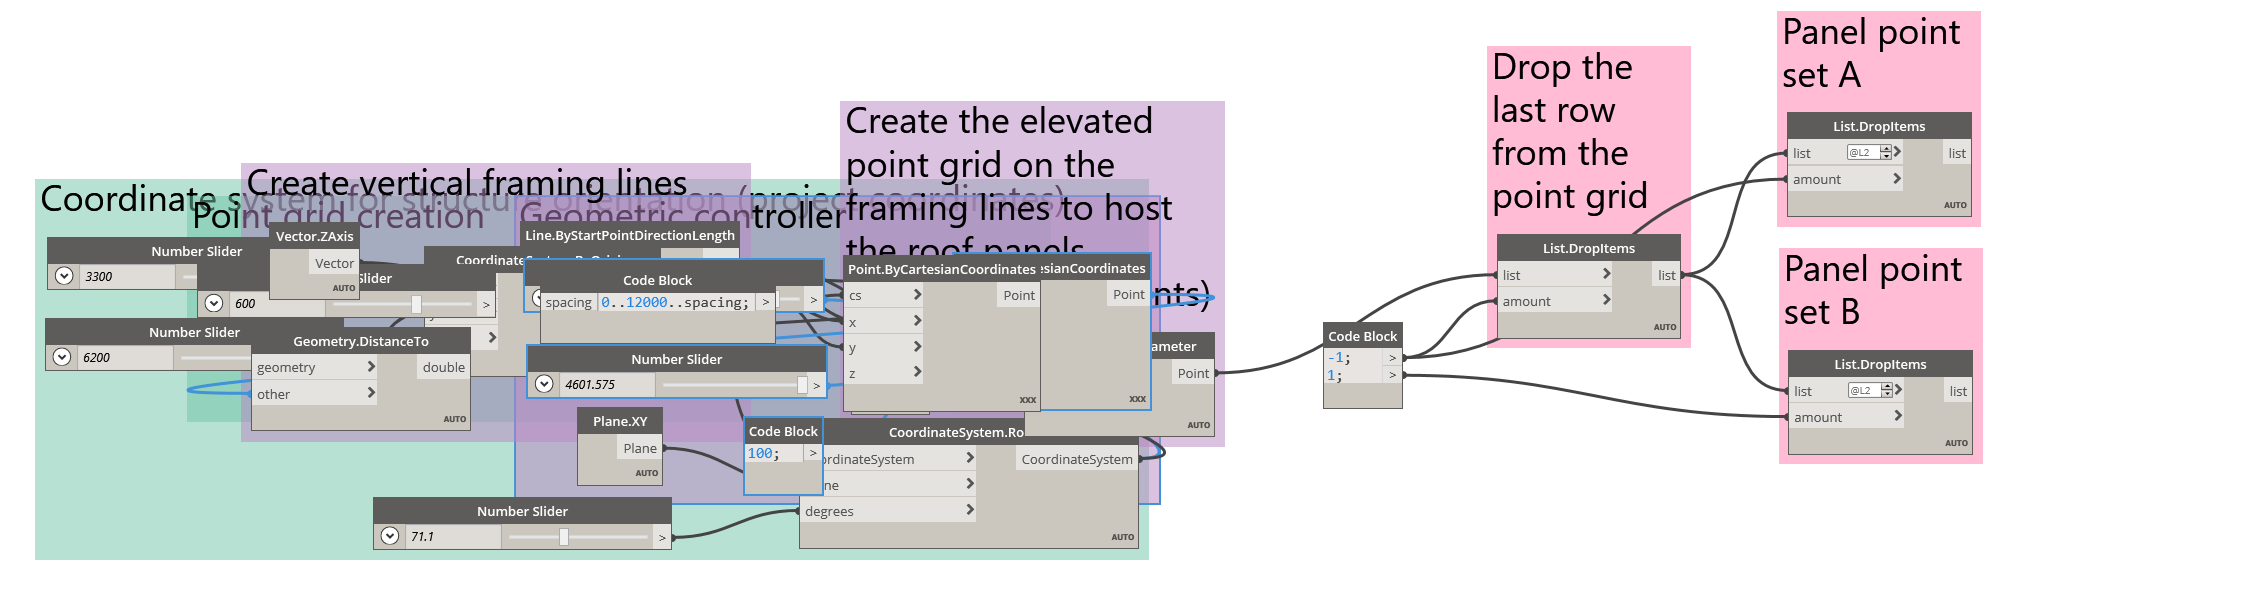
 Dropping the last row, which neither pointA nor pointB uses.
Group this node with a meaningful name referencing the sets it defines.
pointA
To create the pointA set, drop the last point from each sub-list. Dynamo's @List level feature lets a node operate at a chosen list rank (depth). Place a new List.DropItems node and connect the previous node's output into its list input, with amount -1 again.

Enable @List level by clicking the > icon on the list input port and checking Use Levels. By default @L2 is selected, which means the node operates at the sub-list level (rank 2) — dropping the last point of each row rather than the last row.
 @L2 makes the node operate on each sub-list.
pointB
To create the pointB set, copy the previous List.DropItems node. Because the first point of each sub-list must be removed, change its amount to 1.
Group these nodes and name them after the point set they output.
pointC and pointD
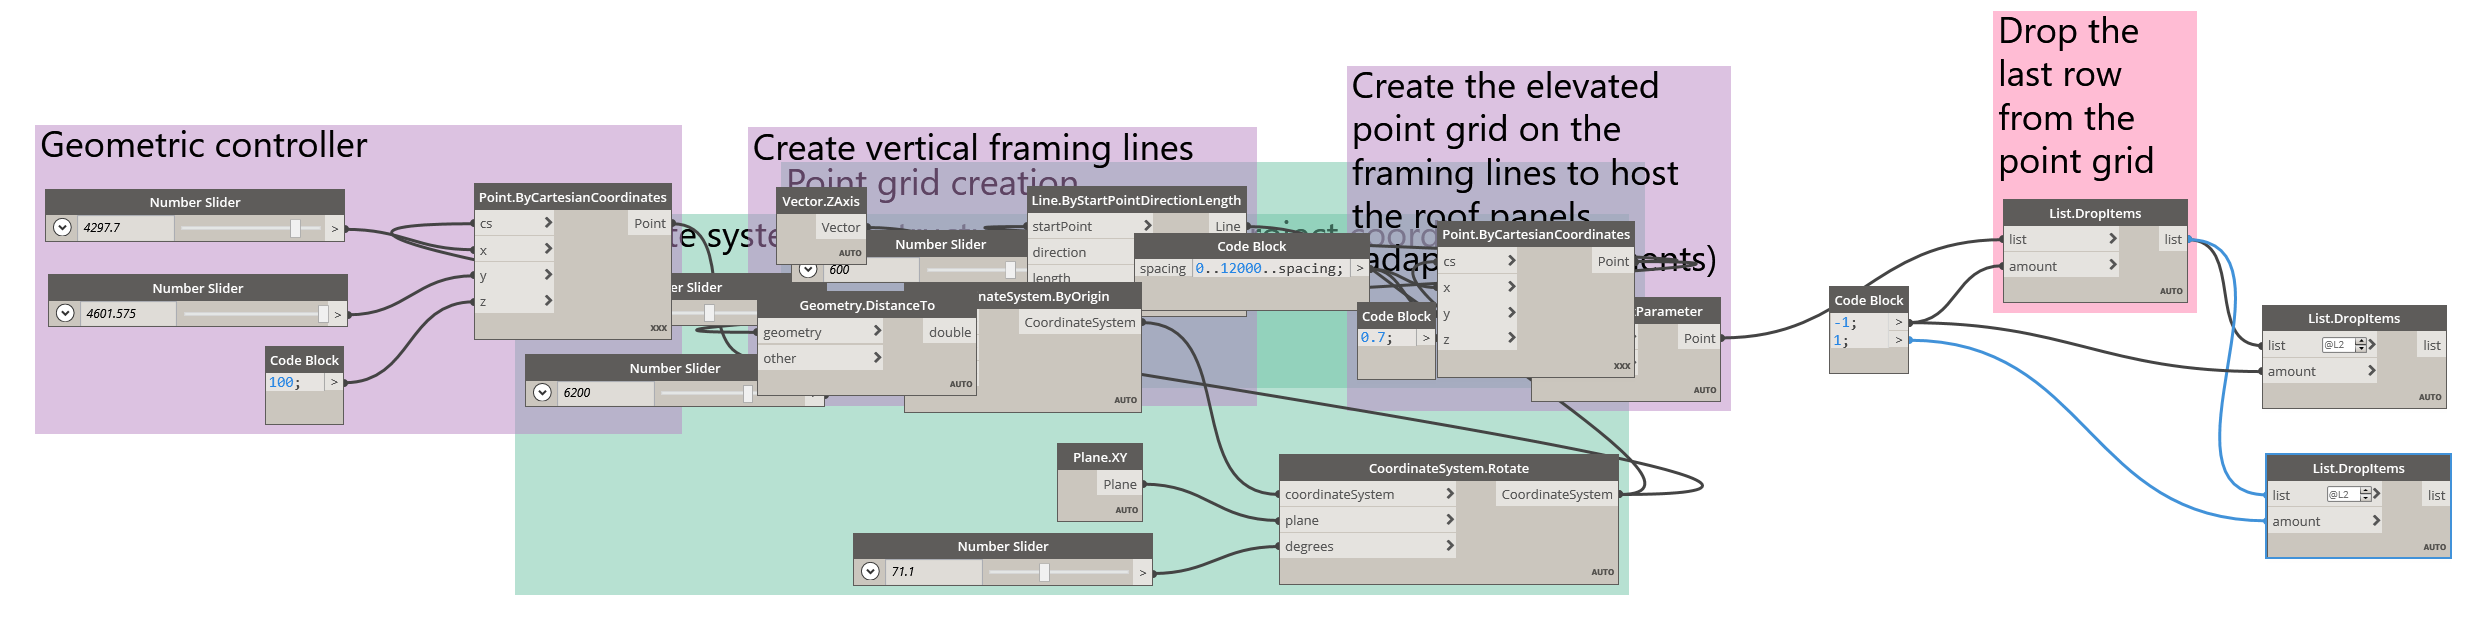
Creating the pointC and pointD sets follows a similar approach, but starts by dropping the first sub-list (the top row). Copy the node that dropped the last row and change its amount to 1.
To create the pointC set, add a new List.DropItems node and connect that output into its list input. This set needs the first point removed from each sub-list, so set amount to 1 and @List level to @L2.

Create pointD by copying the previous node and changing its amount to -1, removing the last point of each sub-list. Group these nodes when complete.
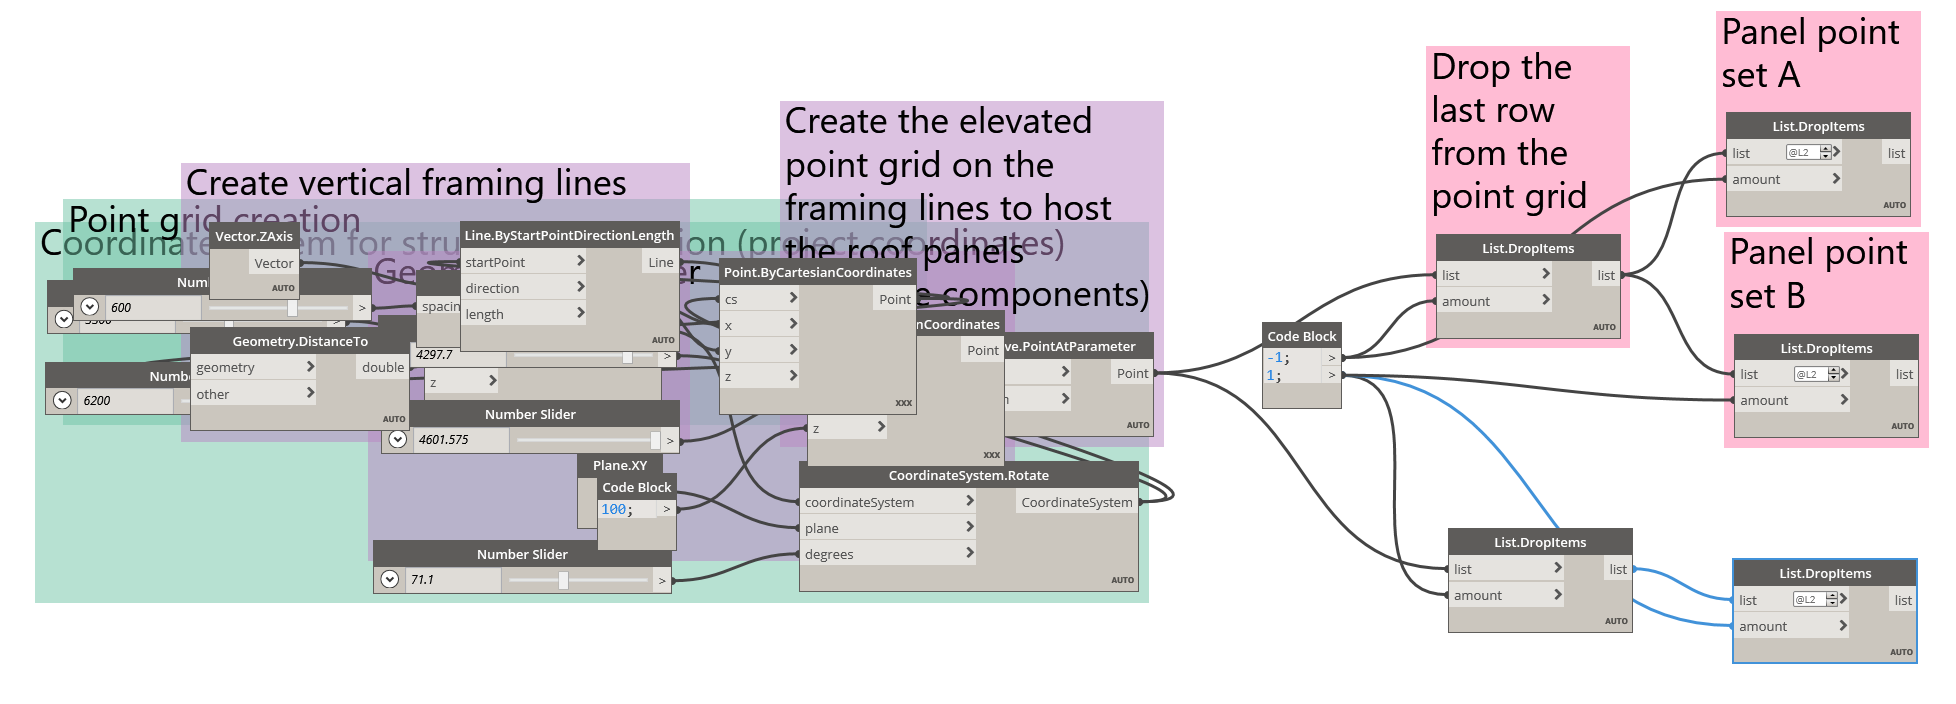
 The four point sets — pointA, pointB, pointC, pointD — ready to be recombined in Step 4.