Grasshopper
Open Grasshopper inside AutoCAD and watch geometry flow live into the viewport.
Opening Grasshopper
Grasshopper is Rhino's visual programming environment, and it runs in AutoCAD as well. Visual programming means you build logic by placing components on a canvas and wiring them together rather than writing code. Each component performs an operation, the wires carry data from one to the next, and the result updates automatically as you change inputs. It lets you define geometry and data parametrically driven by adjustable values, so you can explore many variations without rebuilding anything by hand.
If you've used Dynamo in Civil 3D or Revit, Grasshopper will feel familiar: both are node-based, parametric, data-flow tools for generating and manipulating geometry. Grasshopper is Rhino's equivalent, and Rhino.Inside.AutoCAD brings it directly into the AutoCAD environment so you can drive AutoCAD geometry with it.
- In AutoCAD, run the
GRASSHOPPERcommand (type it, or use the toolbar button). - Grasshopper needs Rhino running underneath it, so RiA starts Rhino behind the scenes for you.
- The familiar Grasshopper canvas appears.
Further reading: How RiA starts Rhino for Grasshopper
What happens depends on whether Rhino is already going:
- If Rhino isn't running yet, it starts in headless mode — the engine runs in the background with no Rhino window shown — and Grasshopper opens on top of it.
- If Rhino is already running (for example, you launched it with
RHINOearlier), Grasshopper simply opens against that existing instance.
Further reading: Closing Rhino and Grasshopper
Closing the Rhino window doesn't close Rhino. If you have the Rhino window open and close it, the window is only hidden — the Rhino engine keeps running in the background so Grasshopper and the AutoCAD link continue to work. To bring the window back, run RHINO again.
Closing the Grasshopper window doesn't close Grasshopper either. It only hides the canvas; any open definitions stay loaded and continue to compute. To actually close a definition:
- Click the definition's name in the top-right of the Grasshopper window.
- A list of all open definitions appears, each with a red ✕.
- Click the red ✕ next to a definition to close it.
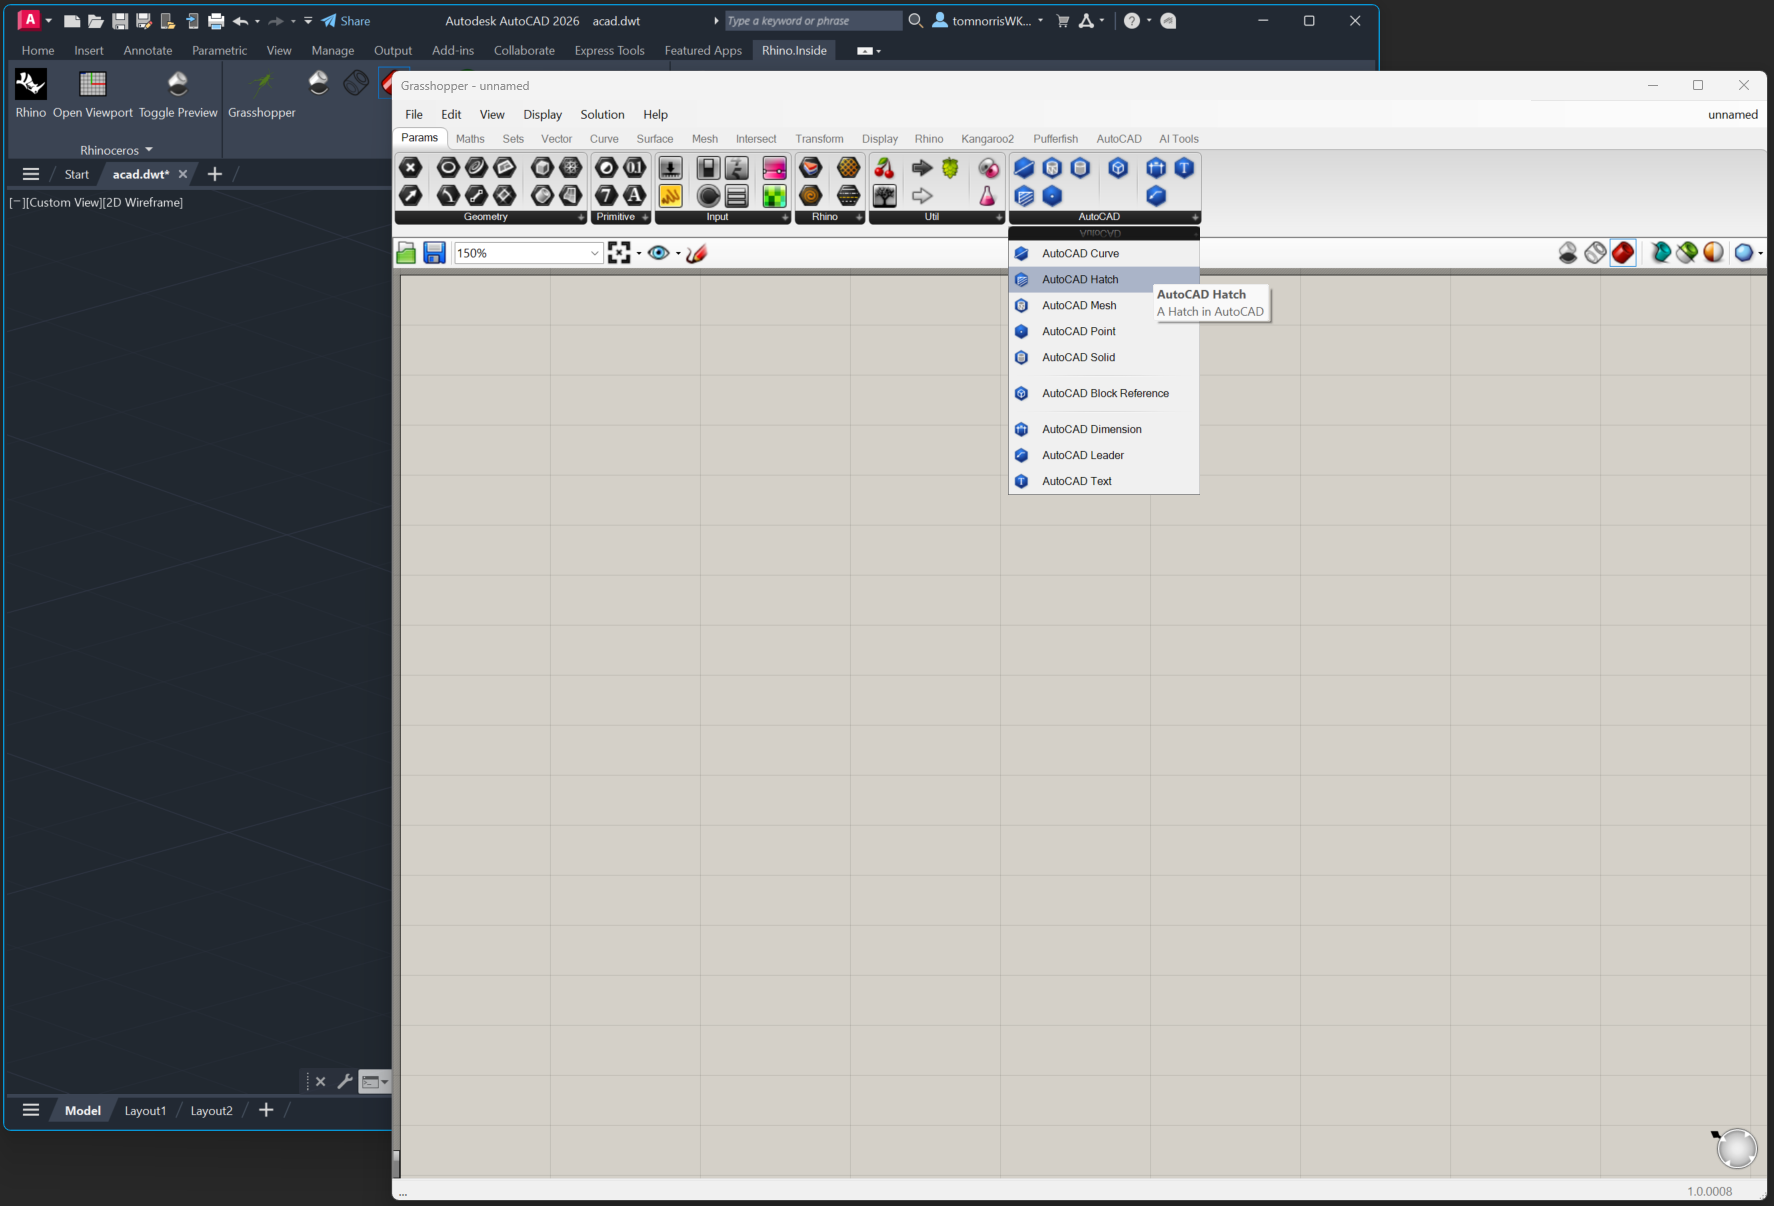 Grasshopper open inside the AutoCAD session.
Orient yourself to the canvas:
- The standard Grasshopper component tabs are all present.
- A dedicated AutoCAD tab is added by Rhino.Inside.AutoCAD — this is where AutoCAD-specific components live, including the baking component you'll use in Baking.
- Under Grasshopper's Params tab you'll also find an AutoCAD group. These are the parameter components used to specify and reference AutoCAD geometry and data (curves, hatches, blocks, and so on) inside your definition. You'll use these parameters to pull existing drawing objects into a definition — see Bringing an AutoCAD object into Grasshopper for a worked hatch example.
- The Grasshopper solver is enabled by default. Each Grasshopper definition is a live document, and any change you make to it — adding or deleting a component, rewiring a connection, or dragging a slider — automatically triggers that document to recompute. The affected part of the definition re-solves immediately, and because of the live link the new result is pushed straight to the AutoCAD viewport. You don't run a build step; editing the definition is what drives the recompute.
GRASSHOPPER vs RHINO. The RHINO command shows the Rhino window; GRASSHOPPER keeps Rhino headless and shows only Grasshopper. Both share the same underlying Rhino environment and the same live link to AutoCAD.
The Grasshopper Preview & Geometry Exchange
This section shows geometry flowing from Grasshopper → Rhino → the AutoCAD viewport, live.
Preview a simple definition
- Place a Circle component. On the Grasshopper ribbon, open the Curves tab, find the Primitives group, and click the Circle button. Then click once on an empty spot on the canvas to drop the component there.
- Add a Number Slider for the radius, using either method:
- From the menus: Params ▸ Input ▸ Slider, then place it on the canvas; or
- Double-click an empty spot on the canvas and type a number — for example
100— to instantly create a slider that runs from0to100.
- Connect the slider to the radius. Drag from the semicircular output node on the right-hand side of the Number Slider and drop it onto the semicircular input node labelled Radius on the Circle component.
- With the Circle's preview on (the default), the resulting geometry appears as a preview in the AutoCAD viewport, exactly like the Rhino preview. (Any component that outputs geometry will do — Circle is just a convenient example.)
- Drag the slider. The geometry updates live in AutoCAD as Grasshopper recomputes — this is the live geometry exchange.
 A circle defined in Grasshopper, previewed live in the AutoCAD viewport.
Same rule as before. The Grasshopper preview is also transient — it's drawn in the viewport but isn't in the AutoCAD database until you bake it.
Control the Grasshopper preview
Rhino.Inside.AutoCAD gives you display modes for the Grasshopper preview, mirroring Grasshopper's own preview settings:
| Command | Effect |
|---|---|
GRASSHOPPER_PREVIEW_SHADED | Show Grasshopper geometry shaded (with wireframe). Partially supported — see the note below. |
GRASSHOPPER_PREVIEW_WIREFRAME | Show Grasshopper geometry as wireframe only |
GRASSHOPPER_PREVIEW_OFF | Hide the Grasshopper preview |
Further reading: Shaded mode is only partially supported
AutoCAD's transient previews don't support solid (shaded) rendering, so GRASSHOPPER_PREVIEW_SHADED looks the same as wireframe most of the time — the shading only makes a visible difference while the camera is moving. Wireframe is the reliable mode to work in.
Two more commands control the solver itself:
| Command | Effect |
|---|---|
GRASSHOPPER_RECOMPUTE | Force the definition to recompute its solution |
GRASSHOPPER_TOGGLE_SOLVER | Enable / disable the Grasshopper solver |
Try turning the wireframe preview off and on. Confirm that moving the slider still updates the AutoCAD preview while the solver is enabled — and that it stops updating once you toggle the solver off.
When your definition is producing the geometry you want, the next step is to commit it into the drawing. Continue to Baking.